


Transcribe Cantonese Speech to Text: With Code Samples and Automated Batch Processing Techniques
In this post, Holly Chan, our Assistant Manager of Digital Humanities, demonstrates how to perform Cantonese speech-to-text transcription with coding. The code she shares will speed up the batch process, further enhance your ability to work with audio data in humanities research.
While the examples in this article use Cantonese speech, the same techniques can be applied to transcribe speech in other languages.
Code
You can find all of the code shown below in this Jupyter Notebook (.ipynb file). If this is your first time using Jupyter Notebook, please refer to our previous tutorial article “How to open .ipynb file (Jupyter Notebook)” for reference.
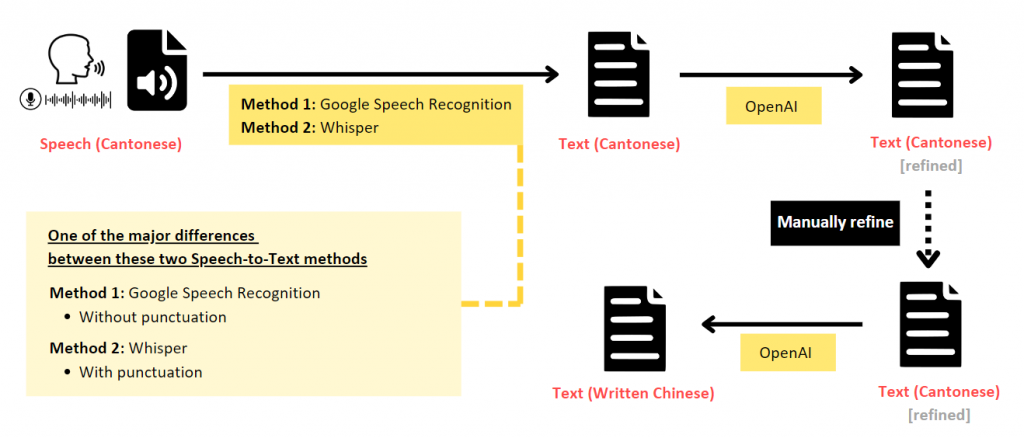
Below is one of the recommended overall workflows:
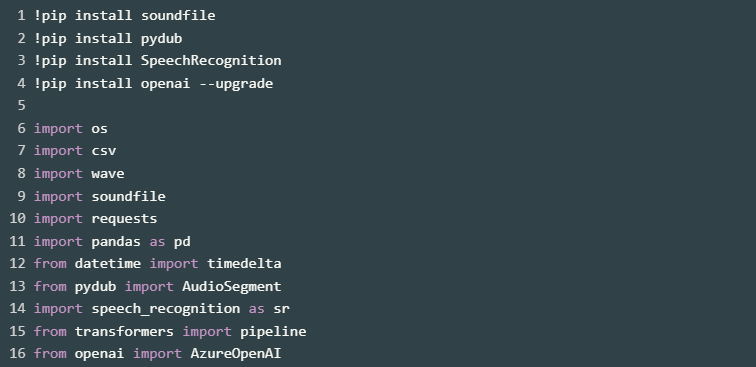
Install and Import Necessary Packages
1. Speech (Cantonese) to Text (Spoken Cantonese)
The first step is to transcribe the speech directly into text that captures the spoken language. This can be achieved using Automated Speech Recognition (ASR) models.
Method 1: Using Google Speech Recognition
The code below uses the speech_recognition library to transcribe the Cantonese audio file into spoken Cantonese text. The recognize_google() function uses Google Speech Recognition to perform this task. For Cantonese, the language code “yue-HK” is used. If you need to work with other languages, please refer to the language code available here: https://cloud.google.com/text-to-speech/docs/voices
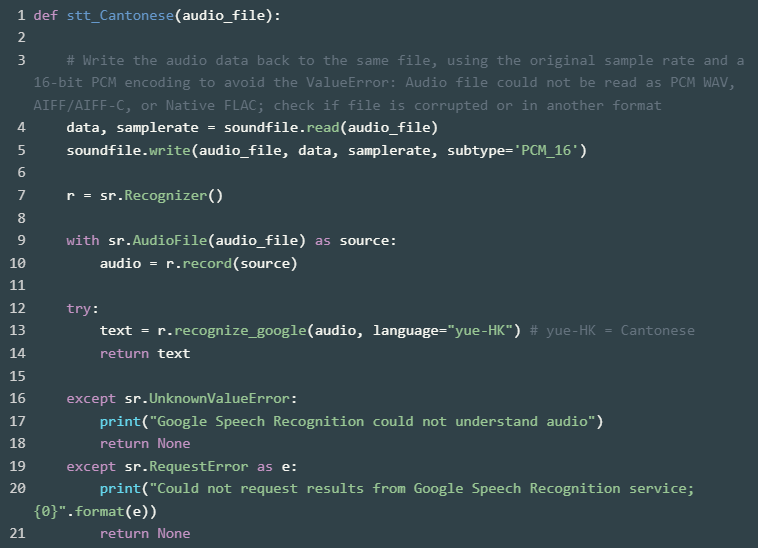

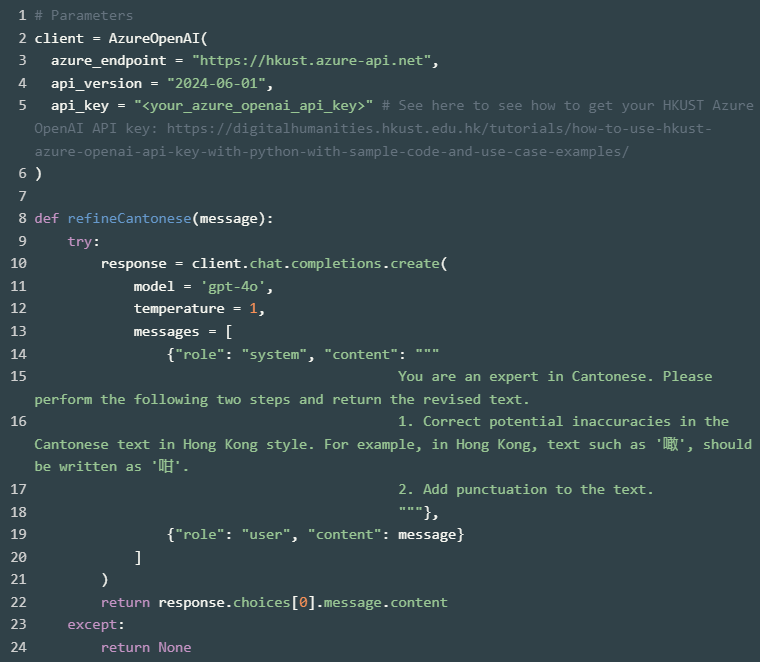
As you can see from the screenshot above, the speech-to-text output from Google Speech Recognition does not include punctuation. To add punctuation to the transcribed text, you could make use of OpenAI.
All HKUST staff and students have monthly free credits for using Azure OpenAI service. Please refer to this article “How to use HKUST Azure OpenAI API key with Python (with sample code and use case examples)” to learn how you can obtain your Azure OpenAI API key.

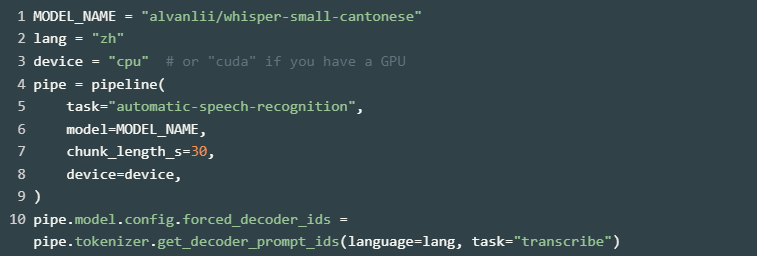
Method 2: Using Whisper model
https://huggingface.co/alvanlii/whisper-small-cantonese The code below uses the Hugging Face Transformers library to load a pre-trained model for translating Cantonese speech to written Chinese text. However, it takes a longer time to process the task than that of Method 1 (see the table below for the comparison).

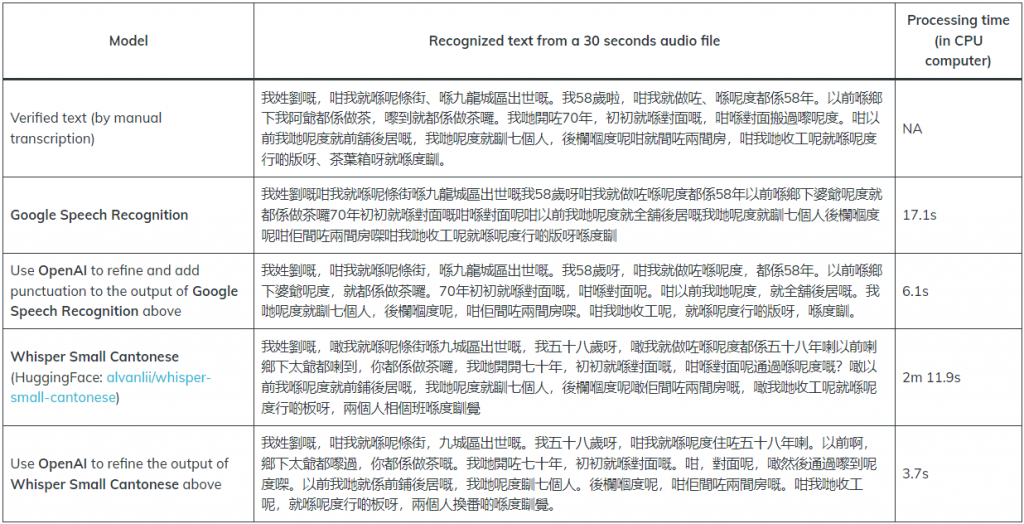
Comparison Between Method 1 and 2
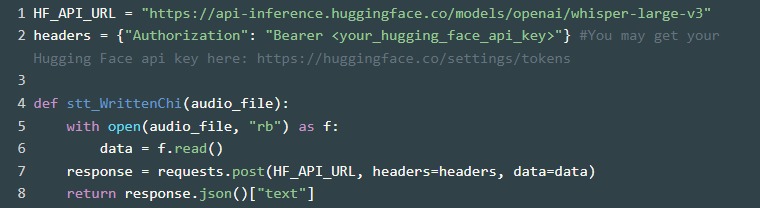
2. Speech (Cantonese) to Text (Written Chinese) Using Whisper V3 Model
https://huggingface.co/openai/whisper-large-v3 We can also use the OpenAI’s Whisper V3 model to transcribe Cantonese speech to Written Chinese text directly.

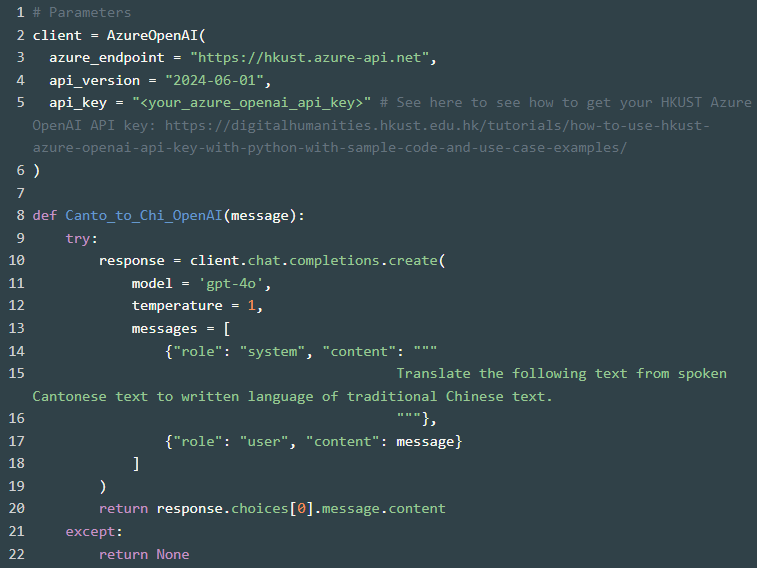
3. Text (Spoken Cantonese) to Text (Written Chinese) Using OpenAI
Since the existing ASR models are not fully accurate, we would recommend improve the Cantonese text output first, and then use that refined Cantonese as the basis for converting it to written Chinese. The code below uses OpenAI to translate the spoken Cantonese text to written Chinese text. You can adjust the prompt message according to your needs.

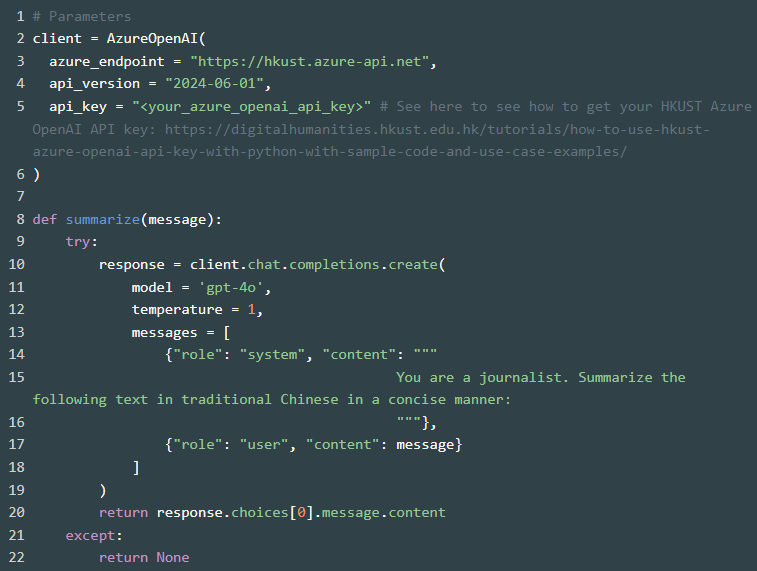
4. Summarize Using OpenAI
To further enhance your research capabilities, you can generate summaries of the transcribed speech or text. This can be particularly useful when dealing with long passages or multiple documents – the summary can give you the key points in a nutshell. You may adjust the prompt message and add more criteria, such as keep the response output within a certain amount of word limit.

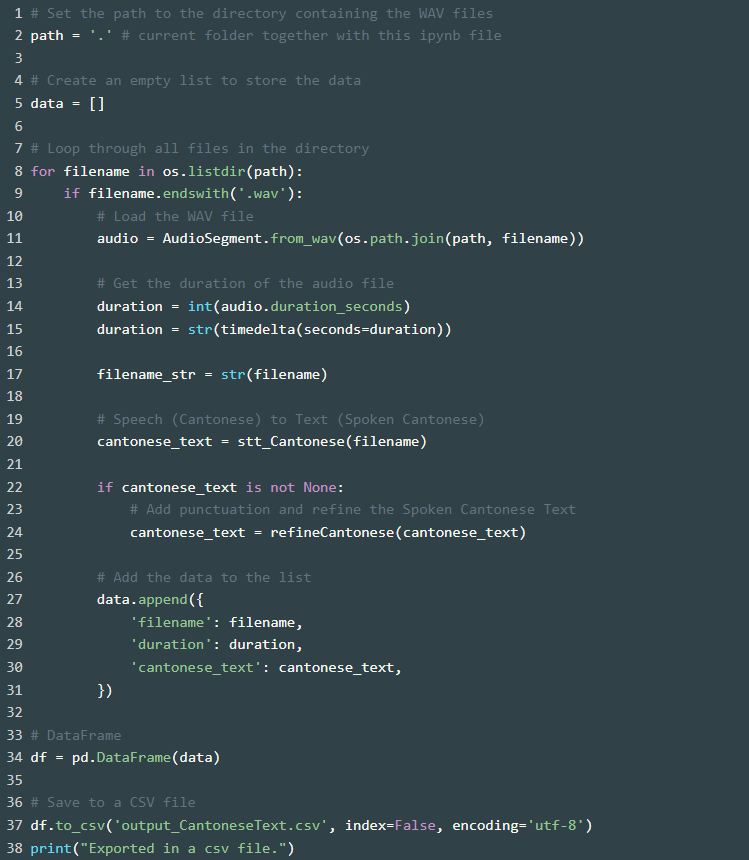
5. Batch Processing and Export to CSV
The code below allows you to process a batch of audio files in the WAV format and export the results (filename, duration, and Cantonese text) to a CSV file. Simply place all your WAV audio files in the same directory in this Jupyter Notebook, and run the code.
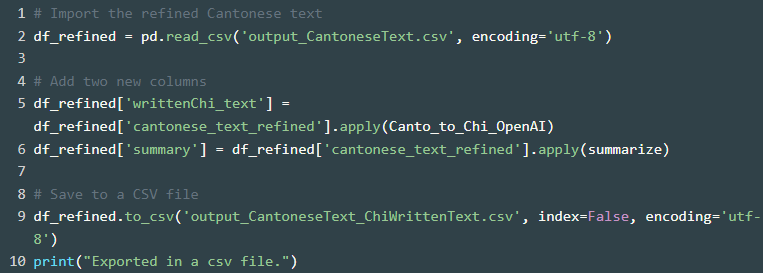
Then, manually check the Cantonese text and refine. Afterward, perform Canto_to_Chi_OpenAI and summarize tasks as follows.
Conclusion
By automating the process of transcribing speech to text and organizing the results in a structured CSV format, researchers can save more time and effort to focus on the analysis and interpretation of the data. Hope this sharing has provided a useful solution to enhance your humanities research projects that involving audio data.
